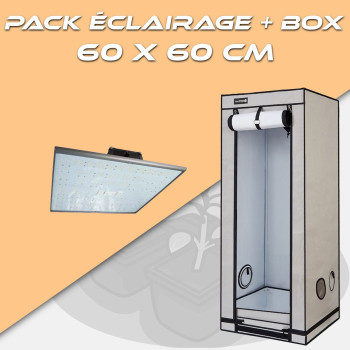
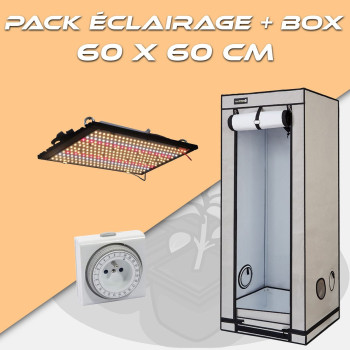
LED-Beleuchtungsset + Growbox 60x60cm: Die Komplettlösung für den Einstieg
Ein LED-Beleuchtungsset + Growbox 60x60cm ist das perfekte Kit, um stressfrei mit dem Indoor-Anbau zu beginnen. Diese Fläche von 0,4m² bietet den idealen Platz für 1 bis 2 Pflanzen in 11L-Töpfen oder bis zu 4 Pflanzen in kleineren Töpfen. Schluss mit komplizierten Berechnungen zwischen LED-Leistung, Box-Dimensionen und Belüftung – alles ist so konzipiert, dass es sofort nach dem Auspacken zusammenarbeitet.
Diese Sets umfassen eine dichte Growbox mit verstärkter Struktur und ein auf diese Fläche kalibriertes Full-Spectrum-LED-Panel. Die Standardhöhe von 160cm ermöglicht ein komfortables vertikales Wachstum, selbst für Sorten, die sich strecken. Ehrlich gesagt, ist dies die perfekte Größe, um verschiedene Techniken auszuprobieren, ohne in überdimensioniertes Material zu investieren.
Warum ein LED-Set + Growbox 60x60cm wählen?
Die 60x60cm Growbox ist der Sweet Spot für den Einstieg: groß genug für zufriedenstellende Ergebnisse, kompakt genug, um diskret zu bleiben. Mit 0,4m² lässt sich die Umgebung leicht steuern, ohne sich bei den Stromkosten zu ruinieren. Moderne LED-Panels verbrauchen für diese Fläche zwischen 100 und 150W, also 3 bis 4 Mal weniger als ein vergleichbares HPS-Kit.
Der Vorteil des Komplettsets ist die garantierte Kompatibilität. Das LED-Panel ist so dimensioniert, dass es die 60x60cm gleichmäßig mit einem optimalen PPFD zwischen 400 und 600 µmol/m²/s je nach Wachstumsphase abdeckt. Sie müssen sich nicht mehr fragen, ob die Beleuchtung zu schwach oder zu stark ist – die Hersteller haben die Berechnungen bereits durchgeführt.
In puncto Praktikabilität verfügen diese Boxen oft über vorgestanzte Öffnungen für die Abluft, verstellbare Aufhängestangen und reflektierende Mylar-Wände. Die Installation dauert maximal 30 Minuten, selbst für Anfänger. Und in Bezug auf Diskretion passt eine 60x60cm Box leicht in einen Schrank oder einen speziellen Raum.
Wie wählt man das richtige LED-Set + Growbox 60x60cm aus?
Erstes Kriterium: die LED-Leistung. Für 0,4m² sollten Sie zwischen 100 und 150W realer Leistung (nicht die Marketing-Äquivalent-Watt) anstreben. Ein 120W-Panel mit Samsung LM301B-Dioden oder ähnlichen wird diese Fläche perfekt abdecken. Hüten Sie sich vor „1000W“-LEDs für 80€ – diese ziehen selten mehr als 100W aus der Steckdose.
Für die Box prüfen Sie die Dicke des Stoffes (mindestens 600D) und die Stabilität der Struktur. Die Stangen müssen mindestens 15kg tragen können, um LED-Panel, Belüftung und Zubehör aufzuhängen. Qualitätsreißverschlüsse sind entscheidend – sie werden hunderte Male geöffnet und geschlossen.
Beim Spektrum bevorzugen Sie ein Full-Spectrum mit Spitzen im Blau (440-460nm) und Rot (660-670nm). Einige Panels fügen UV und IR hinzu, aber das ist ein Bonus. Das Wichtigste ist ein ausgewogenes Spektrum, das einen Wechsel der Beleuchtung zwischen Wachstum und Blüte vermeidet.
Denken Sie auch an die Wärmeableitung. Auch wenn LEDs weniger Wärme abgeben, kann ein 120W-Panel auf 0,4m² die Temperatur in die Höhe treiben. Stellen Sie sicher, dass die Box Öffnungen für einen 100- oder 125mm-Abluftventilator hat. Ein kleiner Umluftventilator ist ebenfalls nicht verkehrt.
Häufig gestellte Fragen
Was ist der ideale Abstand zwischen dem LED-Panel und den Pflanzen in einer 60x60cm Box?
Für ein 100-150W LED-Panel halten Sie einen Abstand von 30-40cm im Wachstum und 25-35cm in der Blüte ein. Dieser Abstand vermeidet Lichtstress und maximiert gleichzeitig die Penetration. Verwenden Sie ein Luxmeter oder eine Smartphone-App zur Überprüfung: Streben Sie 25000-35000 Lux im Wachstum und 35000-50000 Lux in der Blüte an. Wenn die oberen Blätter gelb werden oder sich kräuseln, ist es zu nah. Passen Sie schrittweise an und beobachten Sie die Reaktion der Pflanzen – sie werden Ihnen sagen, ob es passt.
Ist dieses Set mit einer 60x60cm Box für 1, 2 oder 4 Pflanzen im Indoor-Anbau geeignet?
Das hängt von Ihrer Technik und der Topfgröße ab. Für SCROG oder LST füllt 1 Pflanze in einem 15-20L Topf den Raum perfekt aus. Im SOG mit 6-7L Töpfen können Sie problemlos 4 Pflanzen unterbringen. Der optimale Kompromiss sind 2 Pflanzen in 11L Töpfen – genug Wurzelraum für eine gute Entwicklung, genug Pflanzen, um Sorten zu variieren. Vermeiden Sie Überbevölkerung: Besser 2 schöne Pflanzen als 4 verkümmerte Pflanzen, die um Licht kämpfen.
Ist das Lichtspektrum dieses LED-Sets Full Spectrum oder muss es für Wachstum und Blüte gewechselt werden?
Moderne Sets integrieren in der Regel Full-Spectrum-Panels, die Wachstum und Blüte ohne Wechsel abdecken. Das Spektrum kombiniert Blau (400-500nm) für kompaktes Wachstum, Rot (600-700nm) für die Blüte und Weiß, um Lücken zu füllen. Einige Panels haben separate „VEG/BLOOM“-Schalter, aber das ist oft Marketing – verwenden Sie beide permanent. Echte Profi-Panels haben nur einen Knopf: AN/AUS. Das moderne Full Spectrum vermeidet Mangelerscheinungen und optimiert die Photosynthese über den gesamten Zyklus.
Wie installiere und befestige ich die LED-Beleuchtung in dieser 60x60cm Growbox ohne zusätzliche Belüftung?
Hängen Sie das LED-Panel mit den mitgelieferten Gurten mittig an die Aufhängestangen, um eine gleichmäßige Verteilung zu gewährleisten. Stellen Sie die Höhe mit den Rollen ein – das ist praktischer als jedes Mal alles auseinanderzubauen. Für die Belüftung reicht ein 100mm Abluftventilator völlig aus, um die Wärme eines 120W-Panels abzuführen. Platzieren Sie ihn oben in der Box mit einem Kanal nach außen. Ein kleiner 15cm Umluftventilator verbessert die Luftzirkulation. Ohne Abluft kann die Temperatur selbst mit LEDs über 30°C steigen – das ist riskant für die Pflanzen.
Wie lange halten die LEDs in diesem Set und wie pflegt man sie, um Überhitzung zu vermeiden?
Qualitäts-LEDs (Samsung, Osram, Bridgelux) halten 50000 bis 100000 Stunden, also 10-15 Jahre bei 12 Stunden/Tag Nutzung. Um vorzeitigen Verschleiß zu vermeiden, sorgen Sie für gute Belüftung und reinigen Sie die Kühlkörper regelmäßig mit einem trockenen Pinsel. Vermeiden Sie direkte Feuchtigkeit auf den elektronischen Komponenten. Erste Anzeichen von Alterung: allmählicher Intensitätsverlust und Farbverschiebung ins Blaue. Ein gut belüftetes Panel in einer 60x60cm Box mit geeigneter Abluft sollte niemals überhitzen. Wenn der Treiber sich heiß anfühlt, ist das ein schlechtes Zeichen.